Showing posts with label Sewing. Show all posts
Showing posts with label Sewing. Show all posts
Tuesday, January 25, 2011
Yummy Felt Veggies
I slightly modified the tutorial at Elemental Stitches for the broccoli. I cut my felt 7" x 4" instead of 9" x 6". For the carrots, I followed I Make Stuff's tutorial. She has created a PDF file with pictures! Gotta love that!
 These are for my granddaughter to use with her new pink kitchen Santa brought her!


Monday, January 03, 2011
First Attempt at Felt Food
Here are the first of the felt foods I made recently. You can't beat a couple of Swiss rolls, donuts, bacon and eggs all with no calories! These were gifts for my granddaughter's birthday. I've seen beads sewn as donut sprinkles, but I chose to use DMC floss instead to prevent a choking hazard.

I use a combination of the Escape Artist tutorial and Skip to My Lou's tutorial for the donuts and Swiss rolls.

The egg tutorial is found on Day to Day. Some of the links to the tutorials were found on Ucreate. I just winged it for the bacon. Easy peasy!
One more great site with many links to felt food is Ohdeedoh.
Saturday, January 01, 2011
Happy New Year with a Strawberry on Top!
The holidays flew by without a single blog post. No looking back though. 2011 is here...so...Happy New Year with a strawberry on top!

I found the tutorial for these sweet felt strawberries here. I think they may look more realistic with a different shade of green felt, but I used what I had on hand. The tutorial is great and easy to follow. Once the red pieces were cut, I just ran them threw the machine and cut them apart later.

Of course, they would also make wonderful clown noses at this point...just saying....

The rest of the sewing was by hand and the "seeds" took the longest to sew. I finished that part while watching TV. If I sew any more, I think I will enlarge the pattern a little just to have more than one size and maybe use fabric instead of felt. Moda Bake Shop has a different tutorial for a larger strawberry sewn in the fabric they offer.

I found the tutorial for these sweet felt strawberries here. I think they may look more realistic with a different shade of green felt, but I used what I had on hand. The tutorial is great and easy to follow. Once the red pieces were cut, I just ran them threw the machine and cut them apart later.

Of course, they would also make wonderful clown noses at this point...just saying....

The rest of the sewing was by hand and the "seeds" took the longest to sew. I finished that part while watching TV. If I sew any more, I think I will enlarge the pattern a little just to have more than one size and maybe use fabric instead of felt. Moda Bake Shop has a different tutorial for a larger strawberry sewn in the fabric they offer.
Friday, March 05, 2010
Another Pillowcase Dress
 This was a fun project! I used the notes I had written before when I helped my DD made the previous pillowcase dress.
She provided the fabric (1 yard cotton)
I purchased the grosgrain ribbon ("shocking electric pink" color) 2 yards
I had vintage brick red rick rack and threads to match in my stash.
Tutorial:
NOTE: Make sure you have your iron handy! There is quite a bit of ironing for this project!
Cut 2 panels (RST-right sides together) 18" wide x 22" long
Press under 1/4" on all 4 side seams (the 22" sides are the side seams)
Press under another 1/4" on all 4 side seams and stitch close to edge.
Pin the 2 panels (RST) at the side seams from the bottom edge up to 16" from the top. (mark with a pin).
Sew 1/2" side seams from bottom edge up to the 16" mark and STOP. (these will later become armholes.)
Press seams flat.
Press under bottom edge 1".
Press under bottom edge additional 1" and pin.
Sew hem close to edge.
 On front and back panel, fold under 1/2" and Press.
Fold under another 1 1/4" and Press, pin and Stitch close to edge. Either lay the 36" ribbon in tunnel before sewing or feed through the tunnel afterward...just be careful not to catch it in the stitching if you do it the first way!)
 Gather the fabric to the middle of the ribbon leaving 7" of gathered front and back panels and equal amounts of ribbon (approx. 14" of ribbon on each side).
Sew the fabric to the ribbon on the edge to keep the ribbon in place.
I cut the ribbon at an angle and burned the edges to keep it from unraveling.
Tuesday, March 02, 2010
Baby Doll Bed & Coverlet
I recovered a doll bed mattress and made a new coverlet for my granddaughter's antique baby doll bed that belonged to her great grandmother. The nursery is painted yellow and has shabby chic pink accents, so my daughter chose a floral print that would better match the room than what was already on the doll bed.
The "Before": The "After":

 I added antique lace and satin ribbon trim. The coverlet originally had been 2 pieces of fabric sewn together and tied to mimic a quilt. I chose to add a layer of batting to the new coverlet and quilted around the edge, tying only in the middle. As you can see, I also stitched up a pillow for the doll bed. Doesn't every dolly need a pillow?? I made a pillowcase for the pillow and added more lace and ribbon trim.
I was pleased with the result since I had no idea what I was doing!
The "Before":
 The "After":
 I added antique lace and satin ribbon trim. The coverlet originally had been 2 pieces of fabric sewn together and tied to mimic a quilt. I chose to add a layer of batting to the new coverlet and quilted around the edge, tying only in the middle. As you can see, I also stitched up a pillow for the doll bed. Doesn't every dolly need a pillow?? I made a pillowcase for the pillow and added more lace and ribbon trim.
I was pleased with the result since I had no idea what I was doing!
Monday, March 01, 2010
Pillowcase Dress & Recycled Shirt Dress
I'm teaching my DD, at Moms the Word, to sew. She wants to make things for her daughter who is one year old (my granddaughter). I took measurements from a purchased pillowcase dress she had and added seam allowances and showed her some basic sewing techniques. All the sewing was straight stitching which was good practice for her on the sewing machine. She had white satin ribbon in her stash that we used for the ties. This photo was taken before the ends of the ribbon were trimmed and treated, so please overlook! The photo doesn't do the dress justice. Hopefully, I'll have one with my beautiful granddaughter modeling it soon!
 Here is an earlier project I sewed a few weeks ago for my granddaughter. My DD found a tutorial on Waldeck Dry Goods blog for a dress made from a shirt with fabric added to it. I didn't follow the tutorial exactly, but it is the same result.
 Of course, it looks much better with my sweet model in it! I used one of my granddaughter's Gap shirts that was getting a little short. She's ready to go shopping!

 Here is an earlier project I sewed a few weeks ago for my granddaughter. My DD found a tutorial on Waldeck Dry Goods blog for a dress made from a shirt with fabric added to it. I didn't follow the tutorial exactly, but it is the same result.
 Of course, it looks much better with my sweet model in it! I used one of my granddaughter's Gap shirts that was getting a little short. She's ready to go shopping!
Wednesday, October 28, 2009
Where The Wild Things Are Furry Frenzy

 I don't get many requests from my DS/23 for sewing projects, but he asked if I could make him a costume of "Max" from "Where The Wild Things Are". (It was one of his favorite books as a kid.) Of course, I told him I would make it for him. It was shipped it to him today. Sure hope he likes it! It's snowy where he is stationed in the army, so I don't think it will be too hot in all that fur!
The Jockstar (love him!) modeled the hood part of the costume for me to get photos. What things we do in the n
 ame of love!
The costume is made of light grey fur. The lining of the hood is showing a little, but it can be tucked in. I was in a time crunch so I didn't have time to tack it to the hood. :( I designed the ears in a cone shape (like the "Max" costume in the book). Black pipe cleaners were used for wolf whiskers.
As for the crown, I would have probably use felt or gold poster board to make one. DS/23 wanted to buy his instead.
Here's the front and back. I would have liked to have altered the pattern for the front and put a placket and buttons (with velcro closures), but I had already cut into the fur before I realized I hadn't modified the pattern yet! It was late at night and I just got carried away with the cutting. That meant I had to go with the pattern and put a zipper in the front. Oh well... By the way, the zipper zips all the way up (I just forgot to do it before snapping the photo!) Arrrgh...
 The back of the costume has the "wolf" tail. You can't tell in the photo, but the tail turned out quite realistic. Hancock Fabrics has just enough of brown/black fur for just the right touch!
 I cut 2 rectangles of fur for the hands/paws. I used white craft foam cut into triangles for the claws. I sewed them upside down onto one long edge of the fur, then flipped them the right way and top-stitched. Next, I sewed 3/4" elastic (from my stash) to each side. The are a little big for me, but should fit DS/23.
 Pattern Review:
I used Easy McCall's Pattern M5956. It wasn't a difficult pattern to sew, but the fur made it tricky. If I was sewing this for a child, I would probably make it in fleece instead of fur. That would make the costume lighter (weight-wise) and I would modify the front as I mentioned earlier (but only if I was creating a "Max" costume, though). Also, the pattern instructs to "clip curves as necessary" in the general info. However, it isn't mentioned again in the numbered instructions. So beware.... if you sew this pattern, don't forget to clip each and every curve!
 On another note, since the movie "Where The Wild Things Are" just came out, why aren't "Max" and monster ready-to-wear costumes available? I think they would have been a big hit this year! Here's the trailer, if you're interested.
Friday, August 07, 2009
Organized Chaos?
I've been slowly getting my office/sewing studio in order. I have quite a bit left to do, but at least I've begun. Baby steps. Here is one corner of my room that has 2 black bookshelves. The bookshelf on the left has some of my sewing patterns. I wouldn't have chosen purple and pink containers, but they were on sale (under $1.50/each) several years ago at Target. They are actually trash cans made out of thick plastic with metal trim. I would prefer to have all the same color (maybe the wall color), but I haven't run across a reasonably (ok, cheap) priced solution yet. What would be totally awesome is those 5 across, 5 down cubbie shelves from Ikea, but now I'm totally dreaming! My cross stitch thread is stored on the bottom shelf in those handy, dandy plastic divided boxes. The black shelf on the right holds reference books, quilting mags, sewing mags, and scrapbooking mags. The bottom shelf is a few card-making supplies. Those will probably be moved as this organized chaos is tamed. The small purple crates were bought at Walmart a couple of weeks ago ($1.50/each). They are a good size for the small bits of fabric. Don't be fooled. Most of that is not fat quarters, but smaller pieces. Our Boston Terrier, Lucy, seems to think I folded all that and placed it there for her to pull out again and again and again! Grrr!


Next to the shelves and crates is my pegboard (a leftover piece that DH put in frame I had from a recycled piece we salvaged and painted some time ago. Since taking this photo a few days ago, it has been tweaked again! However, the main change is the 2 baskets of tulle have been moved, and in their place will be 2 more small crates to hold the patterns that Lucy keeps pulling off the lower shelves!
She's a plastic freak, and of course, just about all my storage is plastic. By moving the patterns to the pegboard, they are beyond her reach, thank goodness! All the fabric in the wire bins (purchased at Gordman's last fall) is from yard sales, estate sales, leftovers from projects, and inherited stash.
I haven't bought hardly any new fabric in years. I need to use up some of this so I can justify buying some new stash. The white shelves formerly were in DS/12's nursery. On the left is the white plastic ba
 sket that the dog kept pulling off and running away with. That spot will be for something else (not sure what yet.) Next to that are some larger pieces of fabric (from an estate sale). On the bottom left, the brown basket thing is a 3-drawer unit I bought a year ago at a yard sale for $2. It holds scrapbooking supplies. Next to that is a couple of photo boxes and my big bite, crop-a-dile II. On the right side is more scrapbooking supplies and photo boxes. Once everything is in a more organized state, I'll give a better tour, but you really don't want to see the rest of the room yet. Trust me.... it looks like this.
 ...
...The rest of the room is one hot mess, I know. Photo sorting is years behind in my house. Hope to have this under control soon. I have made progress, but there so much more to sift through.
Changing gears....DS/12 had 2 teeth pulled and was quite the trooper. He had a good nurse too!
See?

Sunday, July 05, 2009
Whipped Up Some Napkins
 I've used cloth napkins for over 20 years instead of paper. I guess I was being green when it wasn't cool yet. The ones we use every day are worn and faded from many washings, so I needed to sew up some more. Digging through the stash I went. I ended up using a remnant of vintage fabric from dear Aunt Eunice (who passed away over 4 years ago). She was a very thrifty lady, too. She was also partial to purple, as am I. While they aren't perfection, they will definitely be used on a daily basis. Eunice would be proud!
No tutorial is needed. They are a piece of cake. I cut four 17 inch squares and folded each side 1/4 inch, then 1/4 inch again for a finished hem. Finished size is 16 inches. So easy.
I still need a few more. I'll have to do some more digging.
Thursday, July 02, 2009
Taggie For Miss P

Here is the first sewing project my DD/27 did mostly on her own. It's a taggie for Miss P.
She used yellow flannel (from my stash) for the back side...so soft! The black and white gingham also pulled from my stash along with the batting. The only cost was ribbon that DD/27 had bought previously. We both wished for a embroidery machine to monogram a big ole "P" right in the middle. Toys can be hooked onto the loops for a really good time. Miss P love
 s it!
s it!
Sunday, June 14, 2009
Tutu-too Delicious

Now you must admit, the tutu from the last post is way cuter with my granddaughter modeling it instead of just hanging on a silly ole hanger! I also made the headband and my daughter attached the flower. I think Miss P is having a photo shoot this weekend and I'm sure she'll love every minute of it.
Thursday, June 11, 2009
No sew Project: Tutu

Here is a tutu I made for my 5 1/2 month old granddaughter. It's the tiniest tutu I've ever seen. I hope it fits her! I found several tutorials online and used a combination of them. The most time-consuming part was cutting the tulle. I used elastic for the waist, but a ribbon would work, too. The elastic has a stiffness that helps hold the waistband in a uniform position which I like.
It's not cross stitching, but it's crafty, at least!
Monday, March 02, 2009
Quickie Recycle/Reuse Project
Well, here is what DS/12 and I came up with for a t-shirt that he never wore. He wanted a book cover for his library book. He already had the patch, too. I just laid out the shirt, put the book on top and cut out a generous amount to allow for error. It was so quick, maybe 30 minutes. He was excited and I was glad to recycle something he had never worn.

It snowed like crazy yesterday! We got between 7 1/2 to 8 inches of glistening snow. You can see my "wedding cake" table to get an idea of just how much snowfall.

Oh, we just discovered our dog, Lucy, thinks she can sing...

It snowed like crazy yesterday! We got between 7 1/2 to 8 inches of glistening snow. You can see my "wedding cake" table to get an idea of just how much snowfall.

Oh, we just discovered our dog, Lucy,
 thinks she can sing...
Monday, February 16, 2009
Sewing Project
I found a great tutorial at Little Birdie Secrets and had to try it.

Can you guess what it is?

It's a nursing cover for a new mom to use when nursing her baby. Boning is sewn into the center of the top so that mom alone has a view of the baby. I wish someone had thought of this when I was having babies!! It cost around $11.00 to make, but it could be made for less if you have the supplies on hand in your stash.

Can you guess what it is?

It's a nursing cover for a new mom to use when nursing her baby. Boning is sewn into the center of the top so that mom alone has a view of the baby. I wish someone had thought of this when I was having babies!! It cost around $11.00 to make, but it could be made for less if you have the supplies on hand in your stash.
Saturday, May 10, 2008
Estates Sale Bargains

Just take a look at the "loot" from the estate sale DS/11 and I found today! I could hardly believe it! I recently had to throw away my pattern cutting board because it was falling apart. The new ones are $6 to $9, and I just haven't replaced it...until now. The last sewing project, a Harry Potter robe for DS/11, was a pain to cut out without a cutting board. I'm so glad to have replaced it without having to pay full price for a new one.
Also, The "hot dog" looking thing is a Dritz seam roll. It's for ironing seams in sleeves and tight areas of clothes. I was so excited when I saw all the thread, I could hardly believe it!! There are over 100 spools and some are wooden (which is a bonus since I use the empty ones for small bits of lace, ric-rac, and trims. I paid $17 for everything. Almost all of the thread I have (prior to this "new" find) is thread from a yard sale I scored about 20 years ago. Any time I can buy second hand, I get more satisfaction knowing I'm being "green". Thrifting is much kinder to our planet, don't you think? It's definitely easier on my budget!!
Wednesday, June 14, 2006
Puppet No. 2
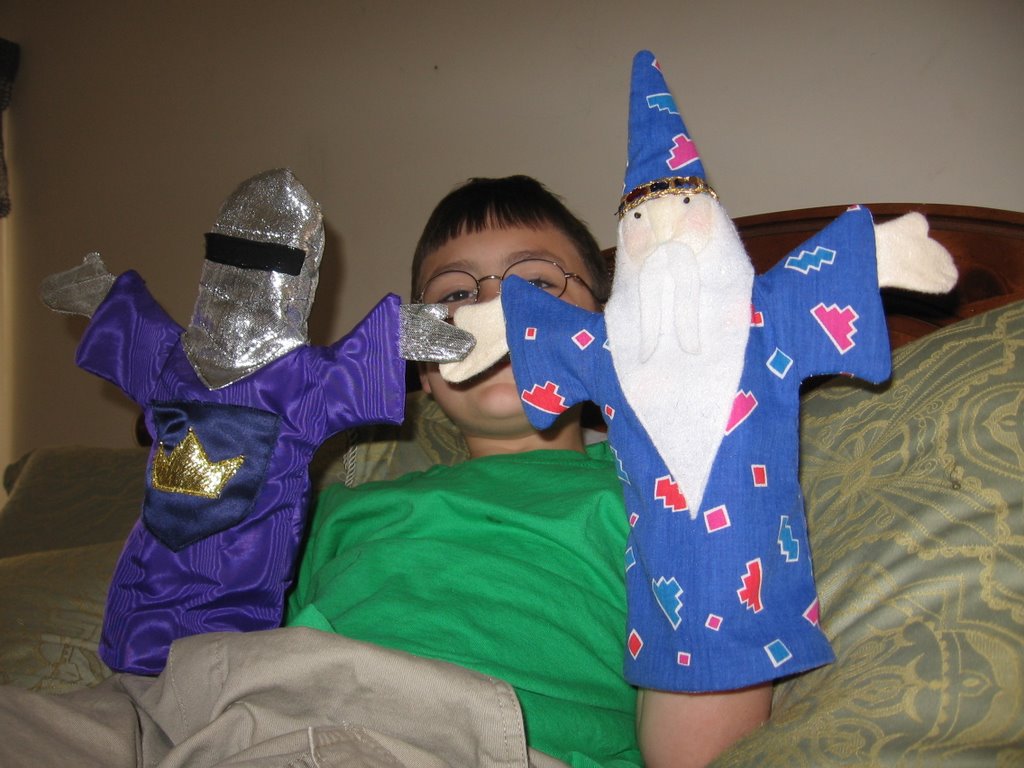
I caved and made another puppet for my DS/9. It's a knight from the same pattern as the wizard, Butterick 3230. It wasn't too hard to make, just tricky with the slippery fabrics! Here's a pic of the duo, ummm, trio.
Tuesday, June 13, 2006
Whirlwind Weekend

We had company from out-of-town this past weekend through today. It was a blast! More on our adventures here.
While I didn't get any cross-stitching time in, I did get to stitch. I sewed a puppet for my son in a 5 hour sewing session! He was very persistent about me making it and was a very happy camper when it was complete!
The puppet was made from Butterick #3230. The blue fabric, beads, trim, and some of the felt, was in my stash. All I bought was the white felt with metallic flecks used for his beard, hair and mustache. It cost me under a $1 to make since I already had the pattern and most of the supplies!
Now, he is wanting me to make the others, but he'll have to wait until I can set aside another 5 hour block to sew the next one. Who knows when that will be!
Thursday, July 14, 2005
Duct Tape Dress Form

After reading Belinda's blog, "View From an Alternate Dementia", I remembered a great duct tape idea I found online. It is how to make a dress form out of duct tape. It's much cheaper than buying a commerical dress form, and the finished result is a body double of yourself. What a cool idea. If you sew clothing for yourself or someone else, it's a great way to cut down on the fittings. I hope to make one (when I start sewing clothing again). Here's another site that has a lot of information and photos and tips, too.
Wednesday, January 12, 2005
Sewing Room Organization
My DH has been on vacation this week so we've been getting some things done around the house. He hung 2 shelves in the sewing/guest room.
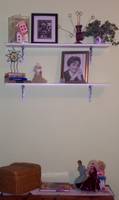
Sewing Room Shelves
I used an large, old frame and some pegboard to create an organizer for the wall. After I painted the frame and the pegboard, DH assembled it and hung it over my sewing machine. It is so cool! (The purple and pink bins hold my sewing patterns.)
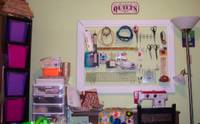
Sewing Station
Next, he hung my "printer's drawer" that holds some of my thread and a thimble collection, on another wall. A few years ago, he made me the spool rack that is on the table beneath the "printer's drawer".
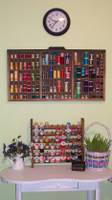
Thread Storage
The white table was a hand-me-down from my aunt. It was brown and stained. I painted it and I'll be adding a fabric skirt to it once I find the right fabric. The color on the walls is actually a bright lime, not mint green.
DH also replaced a faucet and the light fixture in our kid's/guest bath. I'm in the process of removing all the wallpaper in the bath so I can paint it. I won't ever wall paper again. I change my mind to often so I need to stick to painting instead of papering. Wallpaper and I do not get along. It was soooo crooked, it was embarrassing. Never again.

Sewing Room Shelves
I used an large, old frame and some pegboard to create an organizer for the wall. After I painted the frame and the pegboard, DH assembled it and hung it over my sewing machine. It is so cool! (The purple and pink bins hold my sewing patterns.)

Sewing Station
Next, he hung my "printer's drawer" that holds some of my thread and a thimble collection, on another wall. A few years ago, he made me the spool rack that is on the table beneath the "printer's drawer".
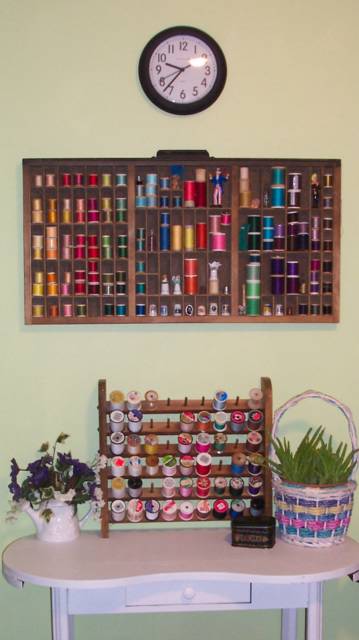
Thread Storage
The white table was a hand-me-down from my aunt. It was brown and stained. I painted it and I'll be adding a fabric skirt to it once I find the right fabric. The color on the walls is actually a bright lime, not mint green.
DH also replaced a faucet and the light fixture in our kid's/guest bath. I'm in the process of removing all the wallpaper in the bath so I can paint it. I won't ever wall paper again. I change my mind to often so I need to stick to painting instead of papering. Wallpaper and I do not get along. It was soooo crooked, it was embarrassing. Never again.
Subscribe to:
Posts (Atom)